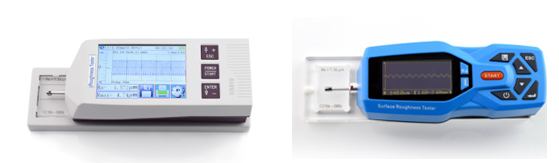
Applications of Surface Roughness Tester
Stylus position of surface roughness tester and levelling of the roughness device
Stylus position of surface roughness tester
Stylus Position on the gauge.
The above is the examples of measuring for flat surface.
When you put the surface roughness tester on the flat surface, check the stylus position, often it is at Zero, or near Zero.
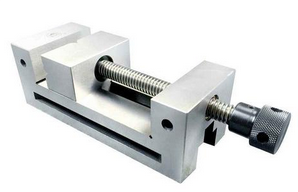
The important is that the flat surface should be large enough to stable support the measuring device, otherwise, even it is flat, a suitable height stand is required to adjust the tester leveling or parallel, and if the sample is very small, the sample will need to be fixed too, using a fixture etc. (you can use yours) or if it is allowed to be sticked, stick it to a heavy flat surface object.
(Vice, plain type)-for fix measuring sample.
For a normal surface roughness tester, actually, 'the stylus position' is to avoid the sensor being put under much pressure or offtrack, the stylus position icon looks like a level ruler, but it is rarely for checking the leveling, it sometimes checks the leveling though.
The stylus position for the surface roughness tester is for indicating where the stylus is at that moment, it can't tell if the stylus perpendicular to the testing surface which is the main point that the measurement should abide by during movement.
When you are using a surface roughness tester, 3 of the factors need concern.
1. The surface roughness device bottom should be parallel to the testing surface. (to visually check)
2. The stylus tip should be perpendicular to the testing surface. (to visually check)
3. Check the stylus position on the gauge, it closes to zero position.
Those three factors complement each other, if the bottom of surface roughness device is parallel to the testing surface, and the stylus position is at the Zero, then often the stylus tip will be perpendicular to the testing surface. In other words, if you had adjusted the main unit body or drive unit body well, still you need check if the main body of the sensor is parallel to the testing surface, because there is room for the main body of the sensor to be flexible.
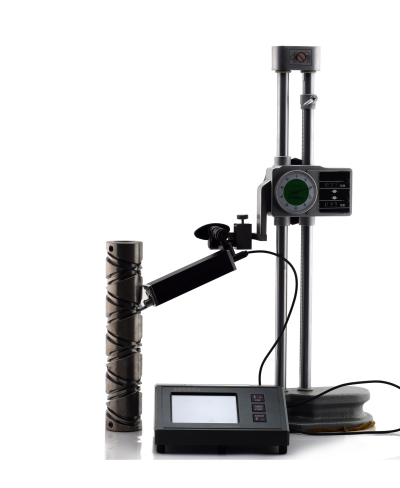
When the surface roughness tester combination with a height stand, it often happens that surface roughness tester not very well parallel to the testing surface due to some reason, in this case, you cannot lower the height stand to force the tester showing stylus position at Zero, because during measurement process, as you can imagine, the sensor will be put under much pressure gradually, this will cause probe damage or wear. On the other hand, if the sensor eventually cannot get to measuring area the surface roughness tester will say OUT OF RANGE.
So, to ensure the stylus perpendicular to the testing surface:

1. It is necessary to make the device bottom to be parallel to the testing surface as much as possible and make it stable. When you use the surface roughness device combination KA520, KA620, the front and back of device can tilt 80 degrees, the right and left side of the device can be tilt very small, while the height gauge allows any orientation.
2. Make sure you understand in what orientation the stand (platform, or height gauge etc) rise, down, then slowly adjust till surface roughness device almost touch the testing surface.
3. Now it will be more easer to check again the 'parallel', if it is ok, slowly adjust the height stand till the actual stylus get to the testing surface, and seeing the actual stylus, it is perpendicular to testing surface, in other word, the main body of the sensor paralleled to the testing surface.
4. Check the STYLUS POSITION, it close to Zero (at zero, plus or minus to zero two degrees is all right), now you can get the surface roughness tester take a measurement.
NOTICE!! when you are using a height stand (height gauge, platform KA520, KA620 or any other), we suggest the main unit or drive unit body not get to the sample, the surface roughness device allows some flexible room for the main body of sensor, not the main unit or drive unit.
Especially when you are measuring in grooves, curves etc, the main body of the testing device are not allowed to get to the sample, because these sensors are L type, if the main unit or drive unit body get to the testing surface will lead the stylus not perpendicular to the testing surface.
1users like this.

Your cart is currently empty.